
The smell hits you first. Not the sharp, citric tang of the lemon-cleaning hacks all over social media. Not the vaguely metallic whiff of store-bought oven cleaner, the kind that makes your throat prickle and your eyes sting just from reading the label. This scent is warmer, softer—like wet earth after rain and the faint sweetness of something you can actually recognize. You slide open the oven door, expecting the usual wall of burnt-cheese fumes and roasted-grease perfume. Instead, there’s…nothing much. Just quiet metal, faintly warm under your fingertips, and a glass door so clear it might not even be there at all.
The Problem with the “Usual Tricks”
Somewhere along the way, our ovens turned into confession booths. Every roasted chicken, every bubbling lasagna, every midnight frozen pizza leaves its little sins behind: the splattered oil, the ooze of melted cheese, the sugar that caramelizes into a dark, sticky varnish that clings to the metal like regret. Eventually, you open that door and avert your eyes. You stop looking too closely at the glass. You tell yourself, “I’ll deal with it next weekend,” the same way you tell yourself you’ll start jogging in the morning.
For years, the internet has offered up the same old absolutions: lemon and baking soda. Lemon halves roasted in a pan of water, the steam supposedly softening every fossilized crumb. Baking soda pasted into every corner, crusting over like a science experiment. Sometimes they help a little, but often they feel like a half-hearted apology. The truly baked-on stuff—the dark, crispy halo around the heating element, the blackened river that flowed over when the fruit pie boiled—laughs at lemon and shrugs at baking soda. And then there’s the scrubbing. The endless circles with a sponge, the plastic scraper, the old toothbrush, each promising progress but mostly delivering sore shoulders.
Maybe you’ve tried the heavy-duty oven cleaners too, the ones that come with warning labels longer than the ingredients list. You hold your breath, spray, and hope for a miracle between coughs. The grease dissolves, yes, but so does the feeling that this is something you should be breathing in your kitchen, inches from the place where dinner lives. It’s effective. It’s also…unsettling.
So when you hear about two quiet, ordinary ingredients—neither lemon nor baking soda—that can lift the worst of the grime with almost no scrubbing, your first reaction is suspicion. The second, if you’re honest, is curiosity.
The Two Unexpected Heroes
The first one waits in a humble bottle you might already have tucked in the back of your cupboard: unscented dish soap. Not the fancy, perfumed kind that smells like a garden party, and not the hyper-degreaser that leaves your hands feeling like cardboard. Just a simple, plain dish soap made to cut through grease on your plates without stripping the life from your skin.
The second comes not in a bottle, but in a soft, fibrous whisper of nature: finely ground wood fiber—in everyday terms, the stuff you’d find in compressed natural cleaning pads or sustainably made scrub cloths that rely on plant fibers instead of harsh synthetics. Think of it as a soft forest turned into a gentle scrubber, able to grip onto grease and crumbs without grinding into your oven’s enamel like sandpaper.
Together, they’re quietly powerful. The dish soap loosens, emulsifies, and persuades the grease to let go, while the plant-based fibers lift it away with a kind of respectful insistence. Not scraping. Not scouring. Just persuading the dirt that its time in the oven is over.
What makes them so different from the classic lemon-and-baking-soda duet isn’t only how well they work—it’s how little effort they ask of you. Less scrubbing, less time hunched in front of the open oven door, less breathing in a storm of chemicals or powders. The secret is in the way you bring these ingredients together and the quiet patience you give them to do their work.
Why These Two Work So Well
Your oven’s worst messes usually fall into three categories: fat, sugar, and char. Oils and animal fats, caramelized sugars from sauces and desserts, and the savage, blackened remains of everything that stayed in just a little too long.
Unscented dish soap is an expert negotiator with fat. Its molecules have one end that loves water and one end that loves oil. When it meets grease, it wraps itself around the fat molecules and lifts them into the water, turning clinging, stubborn oil into something that floats free and washes away.
Plant-based wood fiber pads, when they’re fine and pliable, behave like a gentle forest floor beneath your fingertips. Instead of slicing into the oven’s surface, they bend and conform to it, using countless tiny fibers to grab onto grime. They offer a kind of “micro-grip” that’s surprisingly effective at teasing loose the residue the soap has already softened.
Used together with warmth and a little time, they become less like cleaning tools and more like a slow-release spell you cast on your oven, then walk away from.
A Slow Ritual, Not a Chore
Imagine this as less of a chore and more of a ritual you give your kitchen every so often—a reset button, a way of honoring the work your oven does for you. To make it tangible, let’s walk through the process, step by sensory step.
Step 1: The Warm-Up
Start by switching your oven on for just a few minutes—not to cooking temperature, just enough to make it pleasantly warm. Around 40–50°C (104–122°F) is ideal, the temperature of a gentle summer day trapped in metal. If you don’t have a thermometer, simply preheat to a low setting for 5 minutes, then turn it off and open the door for a moment to release excess heat. You want it warm, not hot.
As the oven slowly radiates that gentle heat, old fats and sugars begin to relax. The blackened splashes soften, the invisible film across the glass door loosens its grip just a little.
Step 2: The Simple Mixture
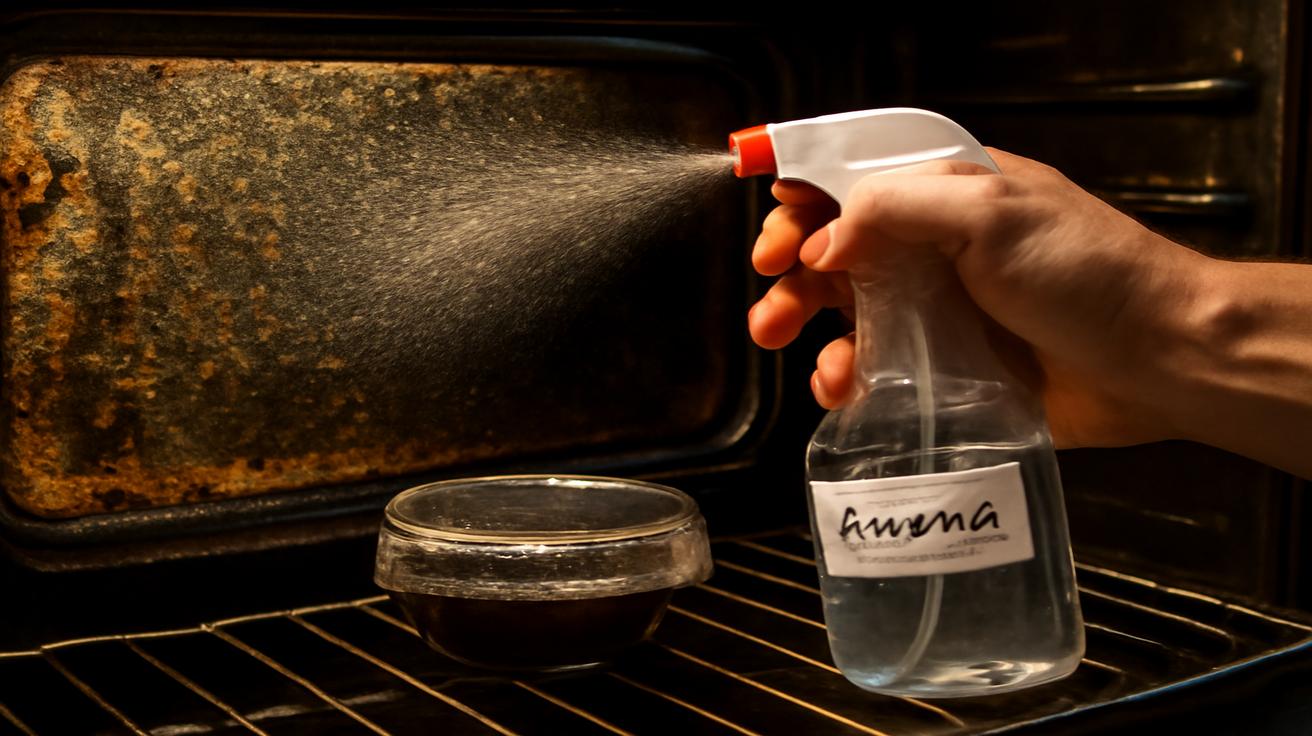
In a small bowl, mix unscented dish soap with warm water. You’re not trying to create a mountain of bubbles, just a silky, lightly soapy liquid, like a pond with a thin sheen of foam on top. About one teaspoon of soap to half a cup of warm water is usually enough to start; you can always make more.
Dip a soft cloth into the mixture and then dab it gently over the oven interior—walls, base, and particularly the glass door. You’re not scrubbing at this point; think of it as brushing on a thin, invisible glaze. Let it pool a little more heavily over the darkest, most stubborn patches. Those are the places that need the most persuasion.
Step 3: The Waiting
Now close the oven door and step away. Leave it like this for 20–40 minutes. In this quiet half-hour, the dish soap is doing its slow chemistry. It seeps into the grease, slips between the burnt-on residue and the enamel, and begins to unhook the bonds that keep them clamped together.
You might put on a kettle, wipe down the counters, or simply sit at the kitchen table and enjoy the rare feeling of a cleaning task that almost runs itself. This pause is part of the trick: giving time for the ingredients to do the work before you ever lift a scrub pad.
The Gentle Touch: Wood Fiber to the Rescue
When you open the oven door again, the metal feels just a hint cooler under your fingers. The air smells faintly of soap and something looser, like the ghost of last month’s roast already beginning to let go.
Step 4: Waking the Grime
Now you bring in the plant-based wood fiber pad—not a hard, scratchy scouring pad, but a soft, flexible one meant for delicate surfaces. Wet it with warm water, squeeze it out until it’s just damp, and then press it lightly against the oven floor.
You’re not attacking. You’re testing. Slide it in small circles, no more pressure than you’d use to wipe crumbs off a wooden table. Often, this is the moment when the magic reveals itself. Sections that once seemed fused to the oven—the blackened drip from a roasting pan, the brown sugar fossil under the heating element—begin to smear, move, and finally, lift. Not with effort, but with a quiet sort of surrender.
On the glass door, those cloudy streaks and dark arcs along the bottom edge start to dissolve. A few more gentle passes and the glass becomes a window again—clear, sharp, honest about what’s going on inside.
Step 5: The Soft Harvest
As the pad fills with loosened grime, rinse it under warm running water, watching the brownish swirl slide down the drain. Then go back in. Work one section at a time: floor, side walls, back panel, glass. The soap that’s left on the oven’s surfaces keeps reactivating, encouraging more grease and char to lift away.
If you hit a truly stubborn, timeworn patch, resist the urge to scrub harder. Instead, reapply a little of the warm soapy mixture, let it sit for another 10 minutes, and then come back with the pad. This approach isn’t about brute force; it’s about patience and persistence, carried out with a light touch.
Before long, the pad glides more smoothly. The sounds change, too: from a faint scratch over roughness to the soft whisper of cloth over clean enamel. That sound, almost more than the sight, tells you it’s working.
The Final Rinse and Quiet Satisfaction
When you’re satisfied—when the surfaces look less like a battlefield and more like a blank page—it’s time for the final ritual.
Step 6: Clearing the Stage
Take a fresh cloth, soak it in clean warm water, and wring it out so it’s damp but not dripping. Wipe down every surface of the oven interior, one deliberate stroke after another. This removes any remaining soap, any loosened fragments of debris, and the memory of what used to be stuck there.
For the glass, finish with a final pass using a slightly drier cloth, moving in long vertical lines. Step back and look: you might see the reflection of your own face now, ghosted faintly in the clean door. Inside, the racks rest against a pale, smooth background, free of the dark halos that once framed them.
Leave the door propped slightly open for 30 minutes to let everything dry completely. When you finally close it again, there’s a feeling of resetting the stage before a new performance. Whatever you cook next will live in a cleaner, calmer space.
Comparing the Methods: A Simple Snapshot
To understand just how different this quiet duo is from the usual suspects, it helps to see them side by side.
| Method | Main Ingredients | Effort Level | Scrubbing Needed | Smell & Comfort |
|---|---|---|---|---|
| Lemon Steam | Lemon, water | Medium | Often a lot on burnt spots | Fresh, but not very powerful |
| Baking Soda Paste | Baking soda, water | Medium–High | Heavy scrubbing in many areas | Neutral, can be messy |
| Chemical Oven Cleaner | Commercial solvents | Low–Medium | Less scrubbing, more waiting | Strong fumes, can be irritating |
| Dish Soap & Wood Fiber | Unscented dish soap, plant fiber pad | Low | Minimal, gentle motions | Mild, comfortable, low-odor |
Living with a Cleaner Oven
Once you’ve seen how easily the grime lets go when you use warmth, time, and the right two ingredients, your relationship with oven cleaning starts to shift. It no longer feels like a once-a-year reckoning you dread and delay, but something you can fold into the rhythm of your kitchen life.
After roasting something particularly splattery—a tray of vegetables glossed in olive oil, a chicken whose fat crackled eagerly over the sides of the pan—you might, on a quiet evening, take five minutes to brush on a little of the soapy mixture while the oven is still gently warm. Let it sit while you eat. Later, a quick pass with the wood fiber pad, a simple wipe, and that’s it. No buildup. No layers of burnt-on memory stacking up, year over year.
This small ritual does something else, too: it changes the way you feel when you cook. There’s a different kind of pleasure in sliding a pan into an oven that looks and smells clean. It’s like walking into a freshly aired room or pulling on a shirt still warm from the sun. The food hasn’t changed—but the place that holds it has, and you can sense it, even if only in the background.
In an age of quick fixes and chemical shortcuts, there’s something quietly radical about returning to simple tools that rely on patience instead of harshness. A mild soap. A gentle plant-based pad. A little warmth. A bit of time. And suddenly the task you dreaded becomes smaller, kinder, almost meditative.
Next time you open your oven door and hesitate at the sight of the darkened walls, remember: you don’t need lemons. You don’t need baking soda. Just a bit of the right soap, a whisper of the forest in your hand, and the willingness to let them work while you breathe easy.
FAQ
Can I use any dish soap for this method?
Choose a simple, unscented or lightly scented dish soap without added bleach or harsh degreasers. If it’s gentle enough for your hands and good at cutting grease on pans, it’s usually suitable for the oven.
What exactly is a wood fiber or plant-based pad?
It’s a cleaning pad made from compressed or woven plant fibers—often wood pulp or similar natural materials. It should feel soft and flexible, not rough like metal or hard synthetic scouring pads, and be labeled as safe for delicate surfaces.
Will this scratch the enamel or glass in my oven?
When you use a fine, plant-based pad and light pressure, it is generally safe for enamel and tempered glass. Avoid any pad that feels gritty or is marketed as heavy-duty for tough outdoor surfaces.
How often should I clean my oven with this method?
For a home that cooks regularly, a light version of this routine every 4–6 weeks keeps buildup under control. After very messy dishes, a quick wipe-down using the same ingredients while the oven is warm can prevent stains from turning into stubborn char.
Does this work on very old, heavily burnt-on stains?
It can significantly soften and reduce older stains, but extremely thick, long-neglected layers may require more than one session. Repeat the soak-and-wipe process over time rather than trying to remove everything in one aggressive cleaning.
Is it safe to use this method in gas and electric ovens?
Yes, it works for both. Just make sure the oven is turned off and only gently warm before you start, and avoid getting excessive water into vents, fans, or gas openings.
Do I need to remove the shelves and racks first?
It helps. Take them out to give yourself space to work, and clean them separately with the same dish-soap mixture and a plant-based pad in the sink or tub. Let everything dry fully before placing racks back in the oven.


Leave a Comment